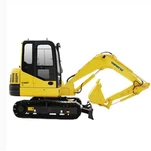
Repairing the water tank of a small loader may involve several steps, depending on the extent of the damage.Here's a general guide to help you get started:

Safety First:
Ensure your safety by wearing appropriate protective gear, such as gloves, safety glasses, and work clothing. Make sure the loader is turned off and disconnected from any power source.
Assessment:
Examine the water tank to identify the type and location of damage. Common issues include leaks, cracks, or punctures. Decide if the damage is repairable, or if the tank needs to be replaced.
Draining the Tank:
If there is water in the tank, drain it completely to prevent any contamination and make it easier to work on. Use a suitable container to collect the water for disposal.
Cleaning the Area:
Clean the area around the damaged section of the tank to ensure proper adhesion of repair materials. Use a solvent or cleaning agent suitable for the tank's material.
Choose the Repair Method:
The repair method depends on the type and size of the damage. You can use the following methods based on the extent of the damage:
a. Epoxy or Plastic Welding: For small cracks or punctures, epoxy or plastic welding can be used. Follow the manufacturer's instructions for the chosen product. Apply the epoxy or plastic welding material over the damaged area, making sure to create a solid bond. Allow it to cure as per the product's specifications.
b. Patch Repair: For larger holes or cracks, consider using a patch. Cut a piece of compatible material to cover the damaged area and use an adhesive or solvent to secure it in place. Ensure a watertight seal.
c. Replacement: In cases of extensive or irreparable damage, it may be necessary to replace the water tank with a new one. This is often the best solution for larger or more complex issues.
Reassembly:
If you used a patch or epoxy, allow sufficient time for it to cure. Once the repair has set, reassemble the loader's water tank components, ensuring all connections and fittings are secure.
Leak Testing:
After the repair is complete and the tank is reassembled, fill it with water and check for any leaks. If there are any leaks, address them promptly.
Testing:
Turn on the loader and check for proper functionality. Ensure there are no further issues with the water tank.
Preventive Maintenance:
To avoid future problems, perform regular maintenance on the water tank, inspect it for damage, and address any issues promptly.
Please note that the specific steps and materials required may vary depending on the make and model of the loader and the type of water tank. It's crucial to consult the loader's user manual and, if necessary, seek guidance from a professional or the manufacturer for the best repair approach for your particular equipment.